

too hexie for my stash...so hexie that it hurts...
I'm your model you know what I mean...
When I do my little joinings on my hexie things!
On my hexie things...you know what I mean.
I can go on and on...
making hexie things.
Making hexies...yay...my hexie things.
Come on now...you know you were humming it along with me! :) A songwriter I will never be, but everyone know that I am 'head over hexie' for hexies. Don't believe me? Just ask any of my students.
And speaking of my students, last Saturday during the Intro to Hexie class one of my students (thank you Jenny Tuomi!) showed me how to make her awesome pincushion. During the class, she drew a hexagon and asked which direction to stitch and then she numbered each one as I went around the hexie. I used her method of writing the numbers on the paper to figure out how to sew it. I couldn't help but make one for myself after hearing her explanation. I love learning new things from my students!!!
Wanna make one for yourself? Yeah, I thought so. And when you finish it, you too can sing the "I'm too hexie for my love" song.
I should have been making a sleeve to go on a quilt that I am to drop off on Monday. I cannot make myself start the stupid sleeve! Anyone want to make some extra money and make and sew it on for me!
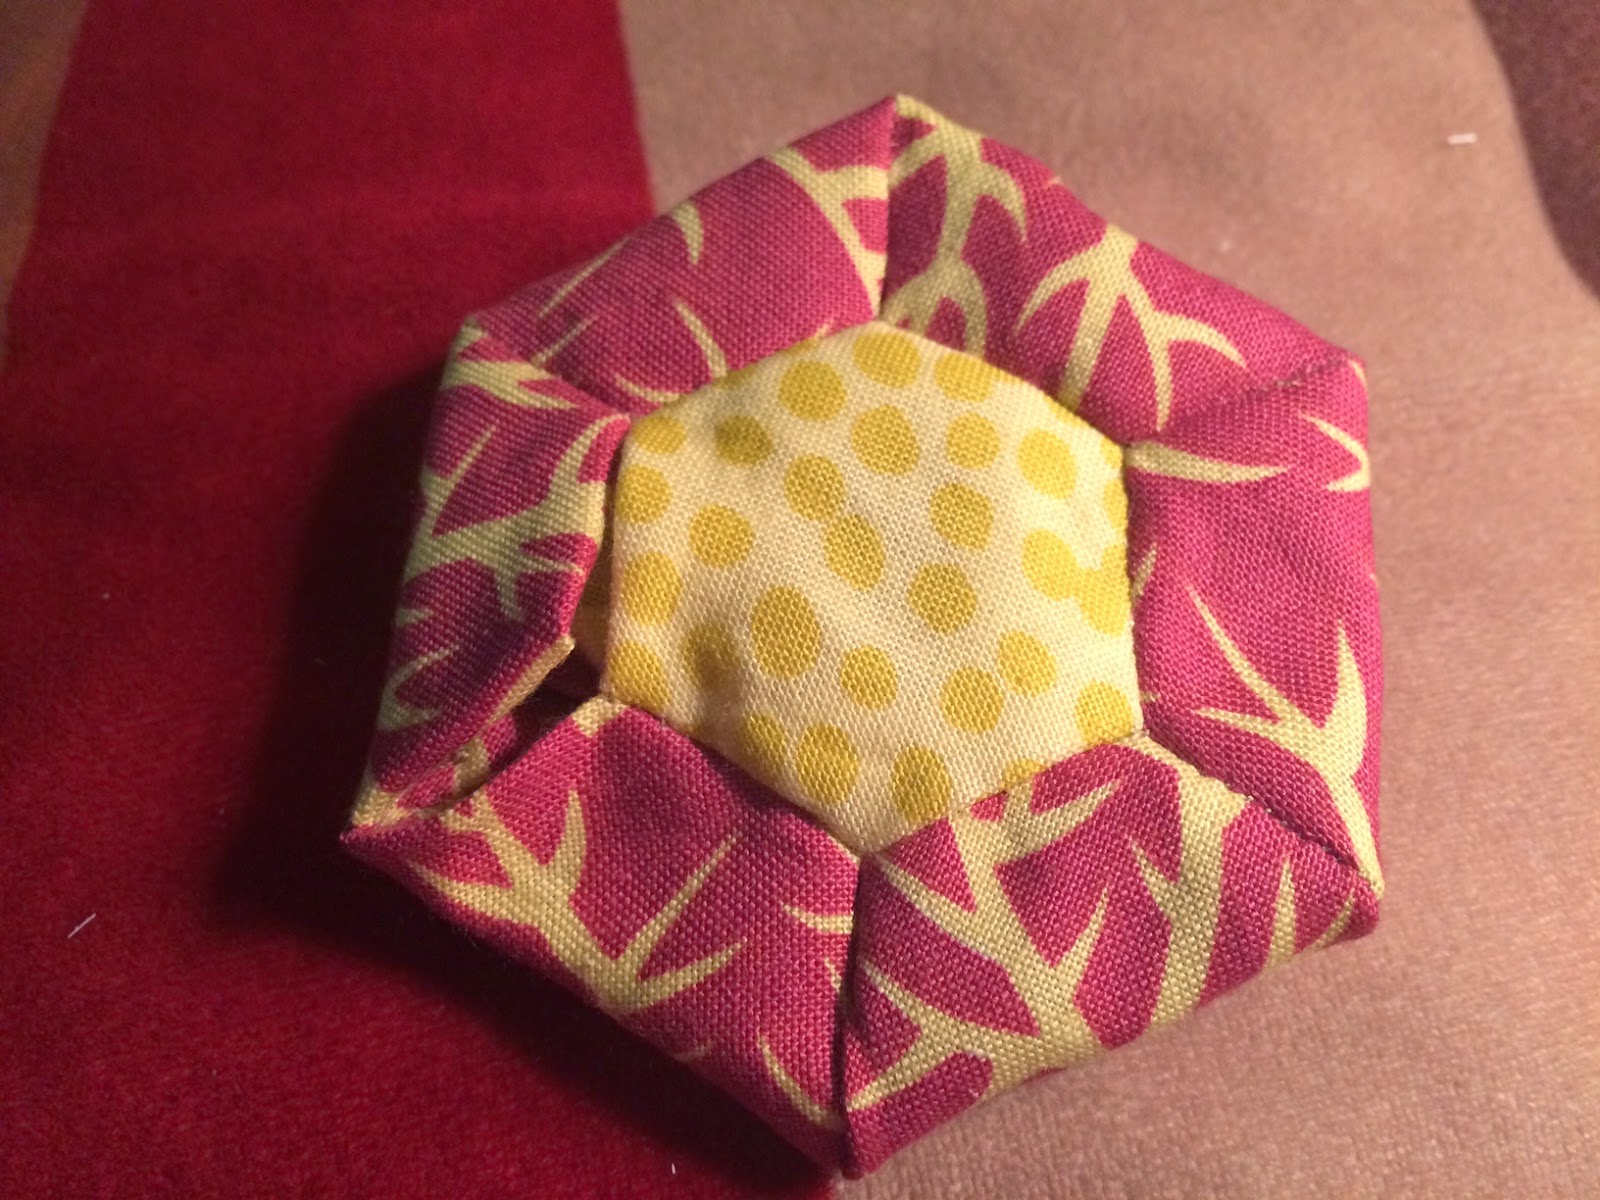
Here is the drawing I made based on Jenny's instructions. I color coded the numbers to help making following it easier. I used 3/4 inch hexie papers and it is a little pincushion that's a perfect travel size.
It is a little fiddly to sew when you get down to the last few corners. Just remember to work on the seam right in front of you and ignore the others sticking out. I couldn't remember when Jenny took the papers out, but I found it too hard to leave them in until the very end so I removed the paper as soon as I had sewn around all sides. For example, I took out the middle (back) hexie as soon as the 6 hexies were sewn on.

Here's the center flower done with Nos. 1 and 2 sewn,


Now go grab some hexie papers and get started!

Did you find someone to sew the sleeve?
ReplyDeleteNo but I did manage to move the sleeve fabric closer to me this morning with plans of cutting into it after this morning's last cup of coffee. Lol. We'll see how it goes.
DeleteLove it JoJo, I will be making one of those....maybe more than one of those actually.😄
ReplyDeleteAnd I know how you feel about the hanging sleeve!
Yay Rita! Please send photos if you make some.
DeleteLove it
ReplyDelete